
I like to give craft gifts to my nieces, at least as part of their gifts for birthdays and other holidays. My oldest niece is 9 and this year for Christmas I decided on some duct tape projects. I knew she had made some other duct tape crafts and she and her brother and sister are always asking their mom to buy more duct tape. Seriously, whoever thought to make colored and patterned duct tape really had no idea what kind of business opportunities they were opening up for their companies!
In buying items for my niece, I decided on an Alex duct tape tote kit I saw at Michael’s for around $9. I also hunted around for a book of projects and ended up getting Tape It and Make It: 101 Duct Tape Activities. I added in 4 rolls of duct tape I picked up at Michael’s and Joann’s at various times when I had coupons or they were on sale. I thought I would make one of the projects in the book to attach to the package when I wrapped it. I was hoping to find a project she might want to also make later and I could show her how. While there were a wide variety of great projects in the book, I found most of them to be a little advanced for her age (or maybe they were a little advanced for me since I’d never actually done any duct tape crafts myself!).
Of course, I had waited until the day before we were exchanging gifts to figure this out, so I promptly went to Pinterest to find the perfect project. I settled on some cute duct tape flower rings, but I couldn’t find any good tutorials on Pinterest. All the links went to Etsy shops or to tutorials people were charging for. While I don’t have any problems paying for patterns or tutorials on something I plan to make more than once, for this one I kept on searching and landed on YouTube where I found a really great video tutorial from the ducttapestuff channel called How To Make a Duct Tape Flower Ring.
High level overview of the steps are below, but I highly suggest watching the video as it’s a very clear tutorial.
Items I used:
- Duct tape
- Cutting mat
- Rotary cutting tool

You could use a ruler and scissors/exacto knife as well. The cutting mat with the ruler on it and rotary cutting tool made the project so fast for me though.
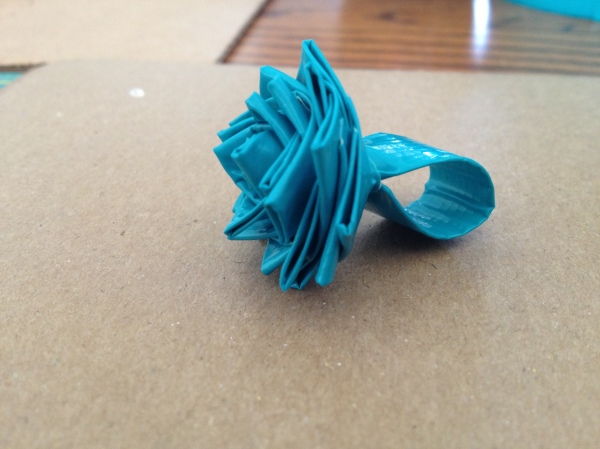
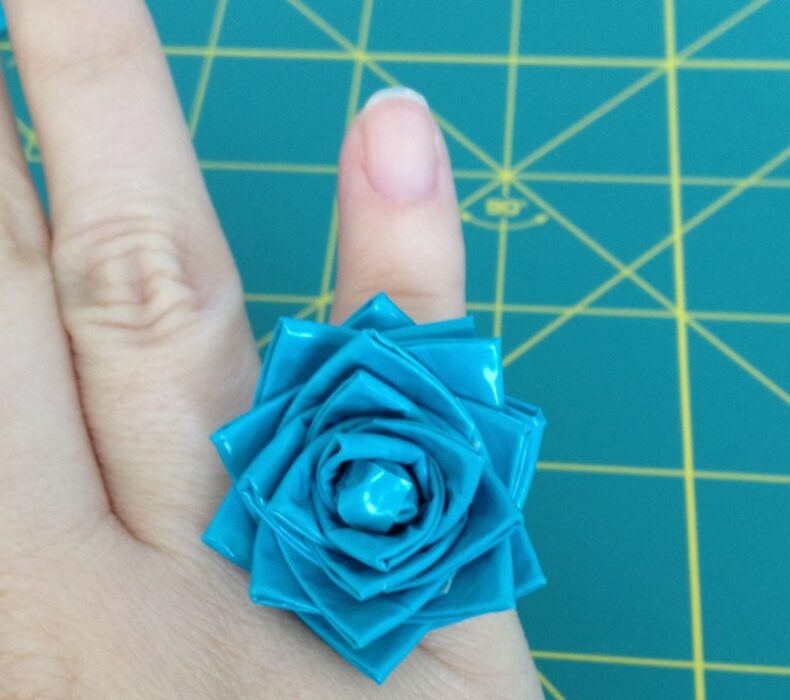
1) Create a band by folding a piece of duct tape to desired band width. I used 1 inch wide and then folded in half for a 1/2″ wide band. Use your finger as a guide for band size (I used my pinkie finger, since this was for my younger niece). Leave about 3/8″ on each side at the top.
2) Fold the 3/8″ piece at the top in half and then bind it with another small piece of duct tape to make the middle of the flower.
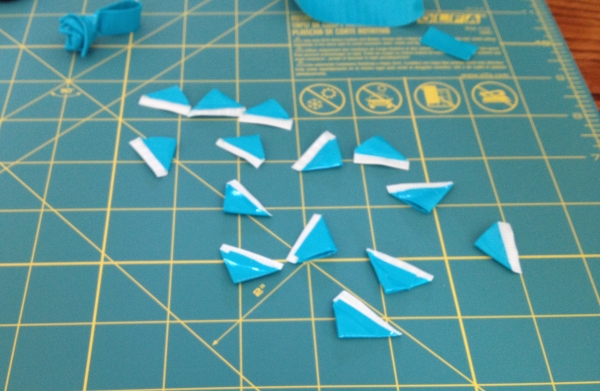
3) To make the flower petals, I used 12″ of duct tape (which is 2″ wide) and cut it into 24 – 1″ squares using my rotary cutting tool.

4) To make the petals, fold one point in so there is an “L” shape of exposed sticky. Fold the other side in so you now have a point on top and still an approximately 1/4″ exposed portion of sticky side. These don’t have to be perfect.
5) Apply all the duct tape petals by alternating around the ring.
6) As mentioned, I used 24 – 1″ petals and I was happy with the “fullness” of the flower.


Honestly, of the several gifts I made for holiday gifts, this one was by far the easiest and the quickest. It took 20-25 minutes start to finish after watching the video. If I were to make any of these again, I might try to make them with slightly smaller petals, maybe go down to 3/4″ squares.