How to Add a Voice Changer Feature While Editing Videos in CapCut
CapCut Desktop Video Editor has emerged as one of the most widely used content creation tools, offering professional-level editing to content creators without requiring a computer expert. It is simple yet has advanced capabilities, making it suitable for both beginners and experienced editors. The voice changer in CapCut is one of the highlights that you can use to change your voice to a fun, creative, or dramatic sound, right in the editor.
CapCut gives you this, plus the ability to trim videos, add text effects, and transitions instead of using other apps on its own. This is what makes it such a versatile editor to edit any type of material, be it YouTube, TikTok, or a business presentation.
This article will discuss step-by-step how to use the voice changer in CapCut Desktop, and then explore the advantages that make CapCut a fully-fledged video editing software.
Benefits of Using CapCut Desktop Video Editor
An all-in-one platform – Use music, edit videos, add effects, and export quality results worry-free, all in the same app.
Creative voice options – The voice changer is an in-built voice changer that provides fun and peculiar tones suitable in the case of a vlog, storytelling, or meme.
Beginner-friendly tools – Easy to use drag and drop design enables users with no previous experience to edit without fear.
Professional editing power – Features such as multi-layer timelines, transitions, and filters make it a serious video editing program for those who create.
High-quality output – Export videos in HD or 4K with smooth playback, ideal for social media and professional platforms.
Visual content support – Combine your edits with an online photo editor to create thumbnails, banners, or cover photos in a fully creative package.
How to Use Voice Changer in CapCut: Step-by-Step Guide
This is simple, even for novice editors. This is the new version of the CapCut Desktop, and the updated steps are shown below.
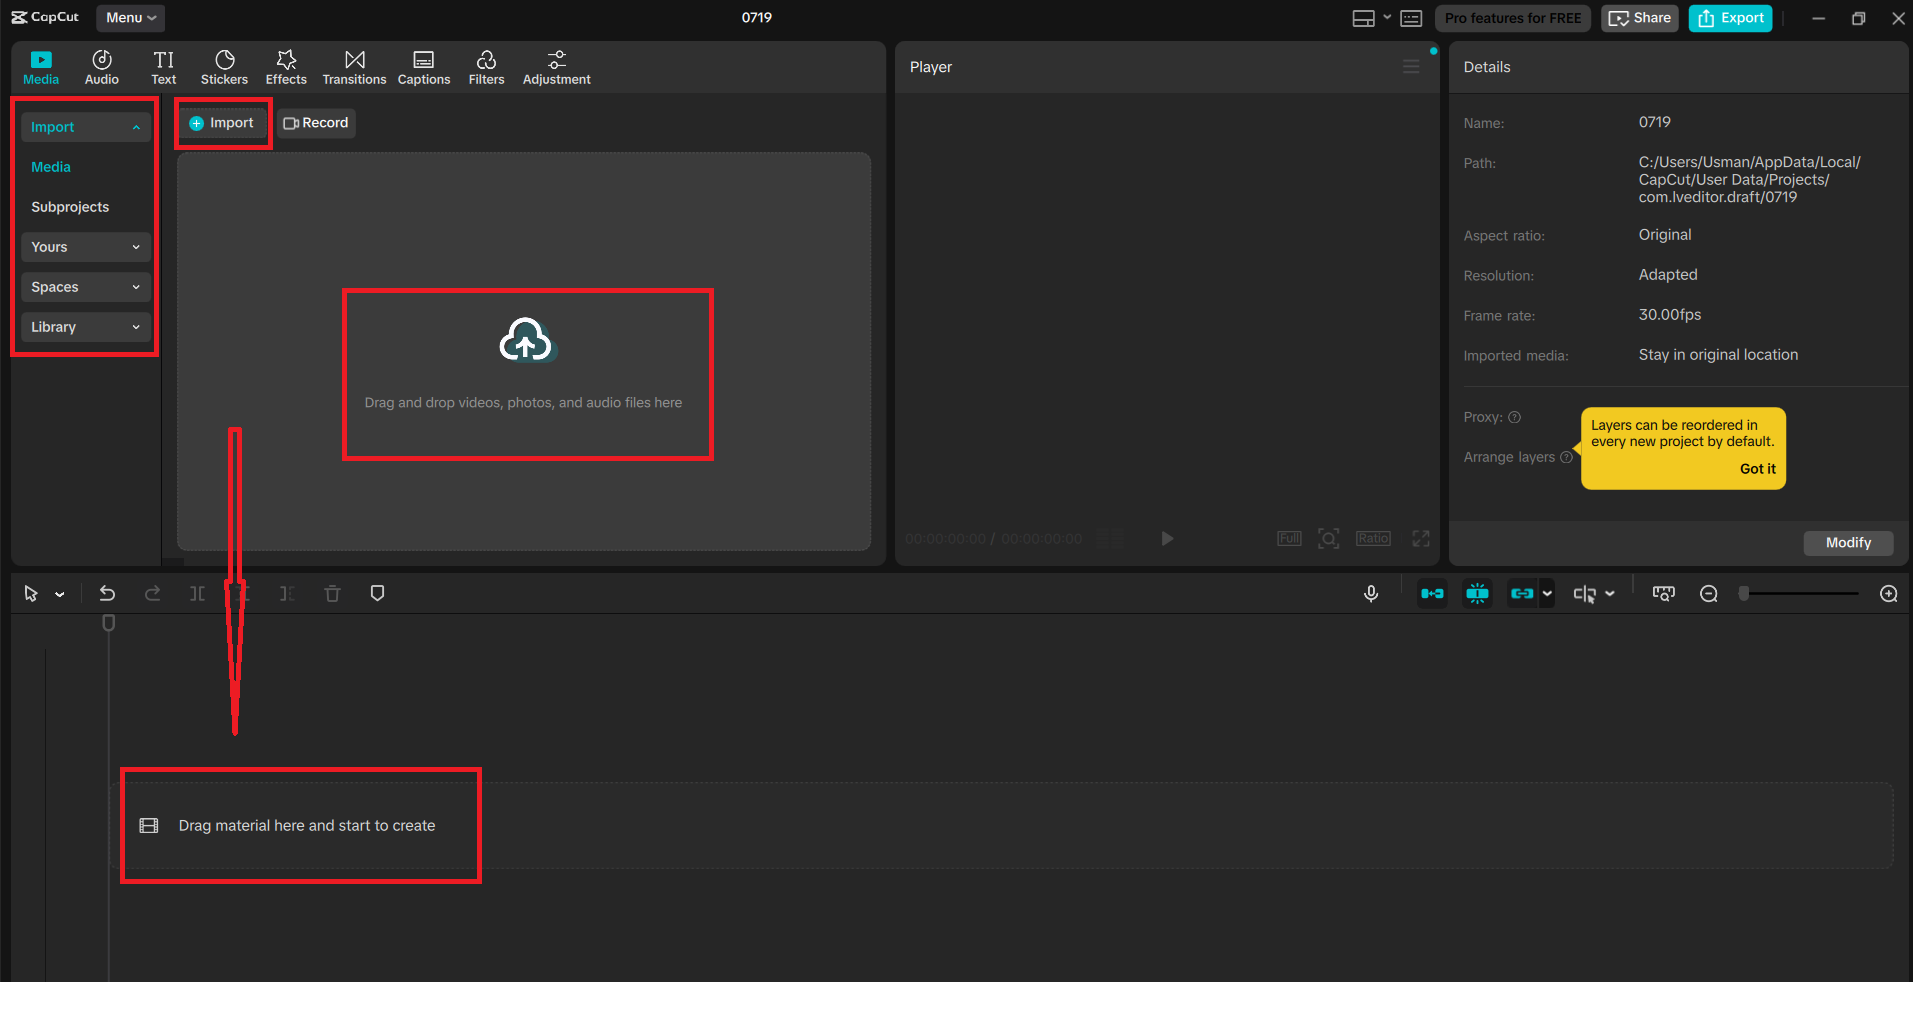
Step 1: Launch CapCut and Create a New Project
Install CapCut Desktop and press New Project. You will be brought to the major editing station. In the upper-left corner, you can add your media files by clicking on Import- it can be a video, music, or voice recording. To start editing, simply drag your files to your timeline. You have the option of importing several clips simultaneously.
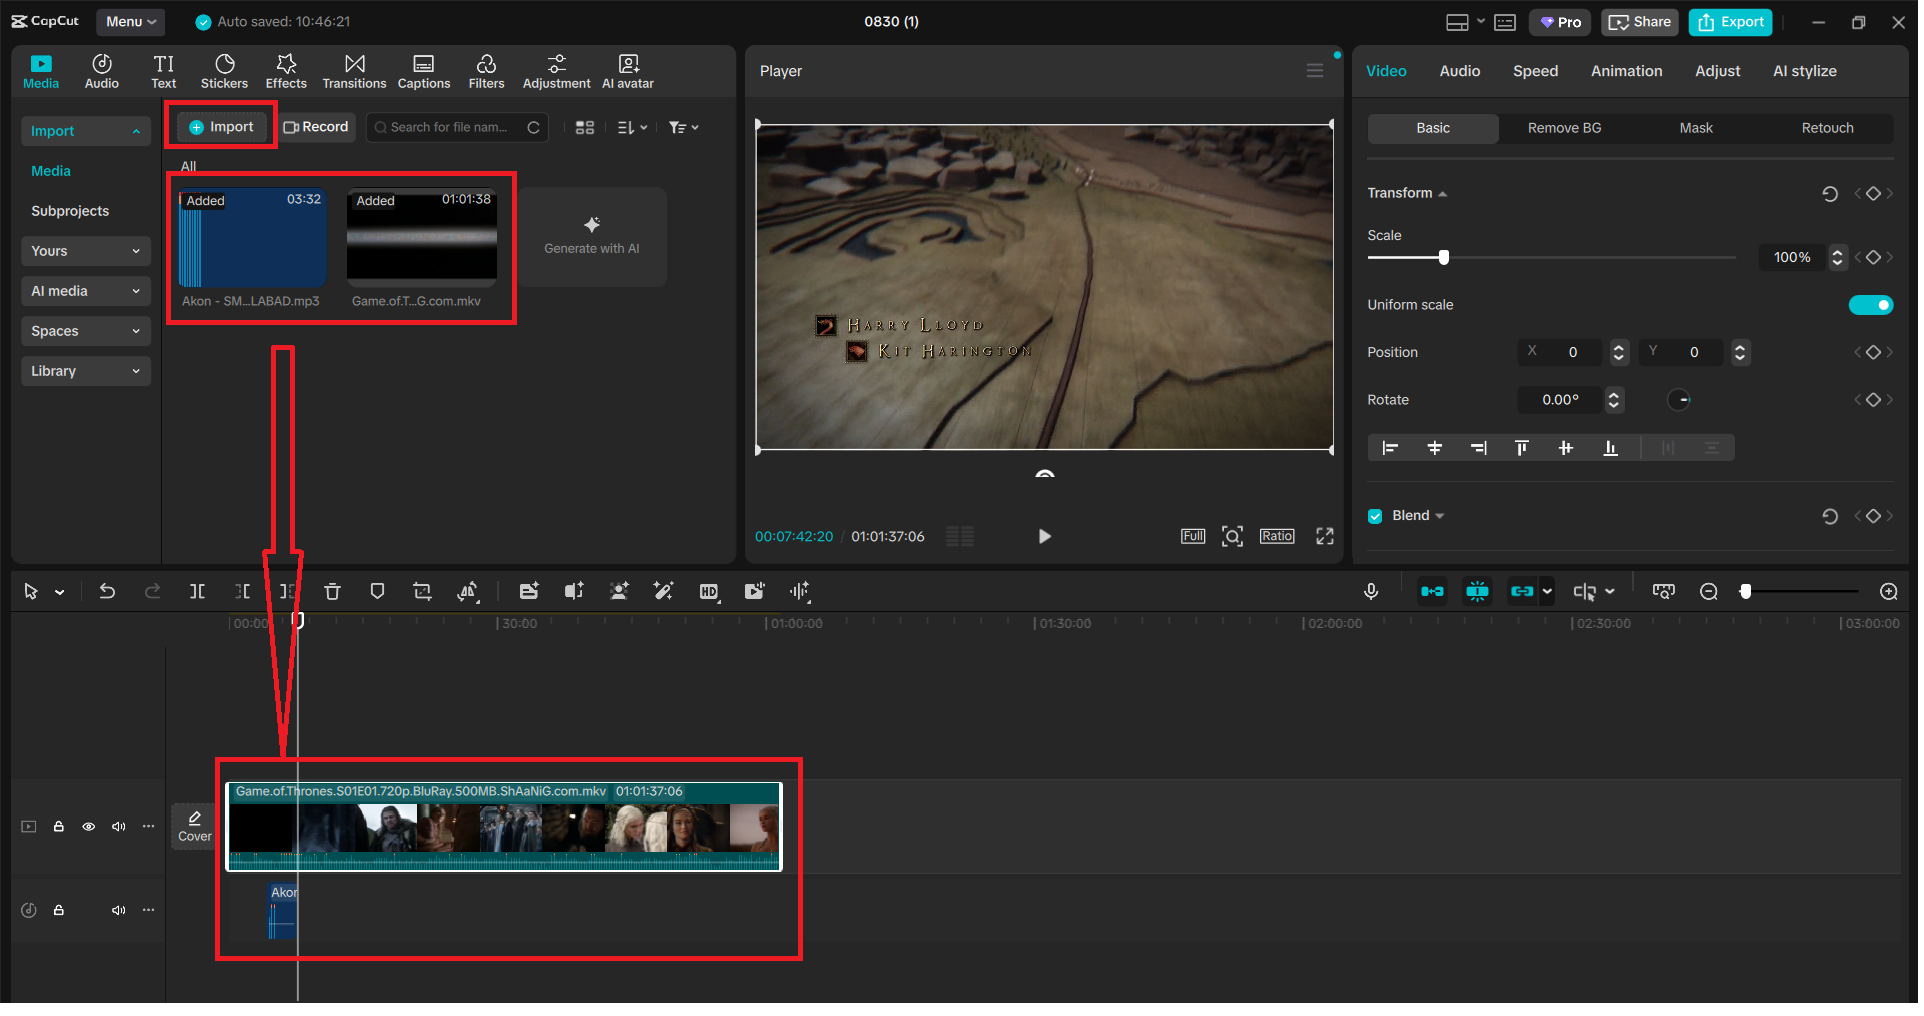
Step 2: Choose Your Audio or Video Clip
In the timeline, you can then just click on the clip that has the audio you wish to edit. This may be an audio file in itself or the audio of a video. Muting means that the effect you are using will only be applied to that certain piece of audio.
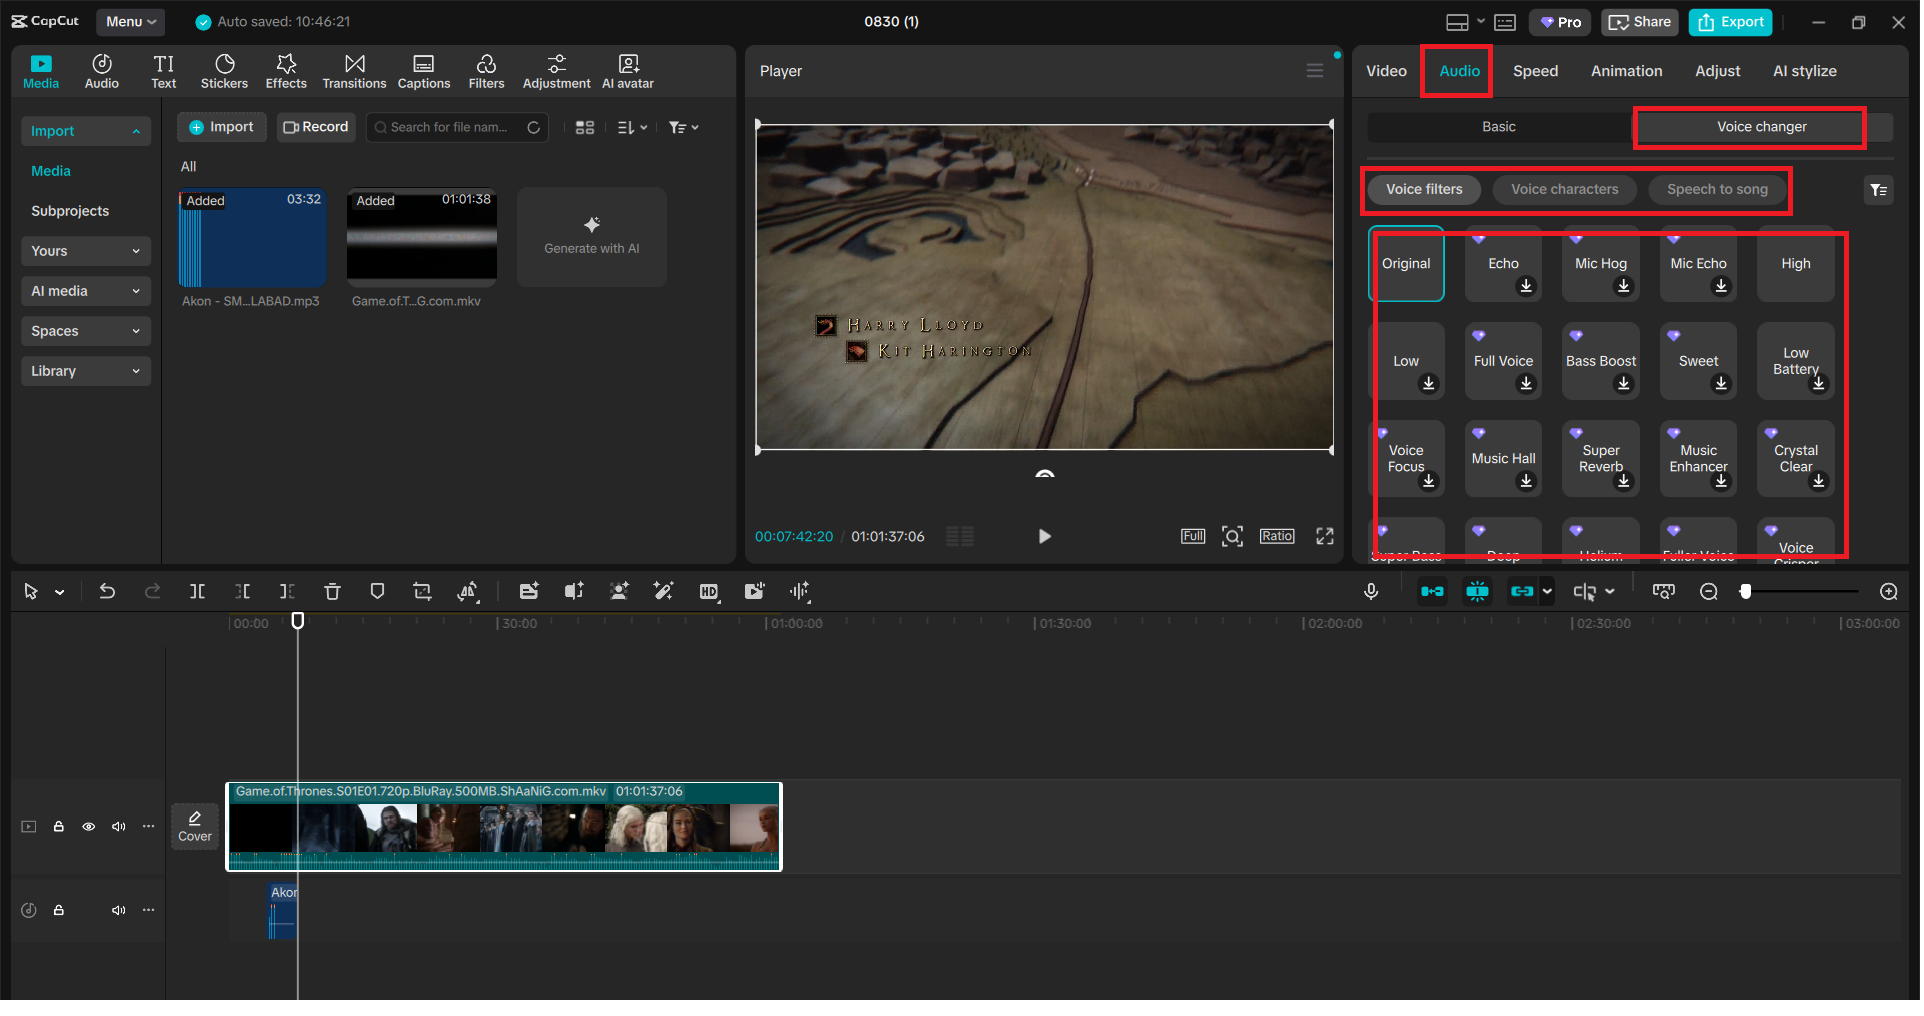
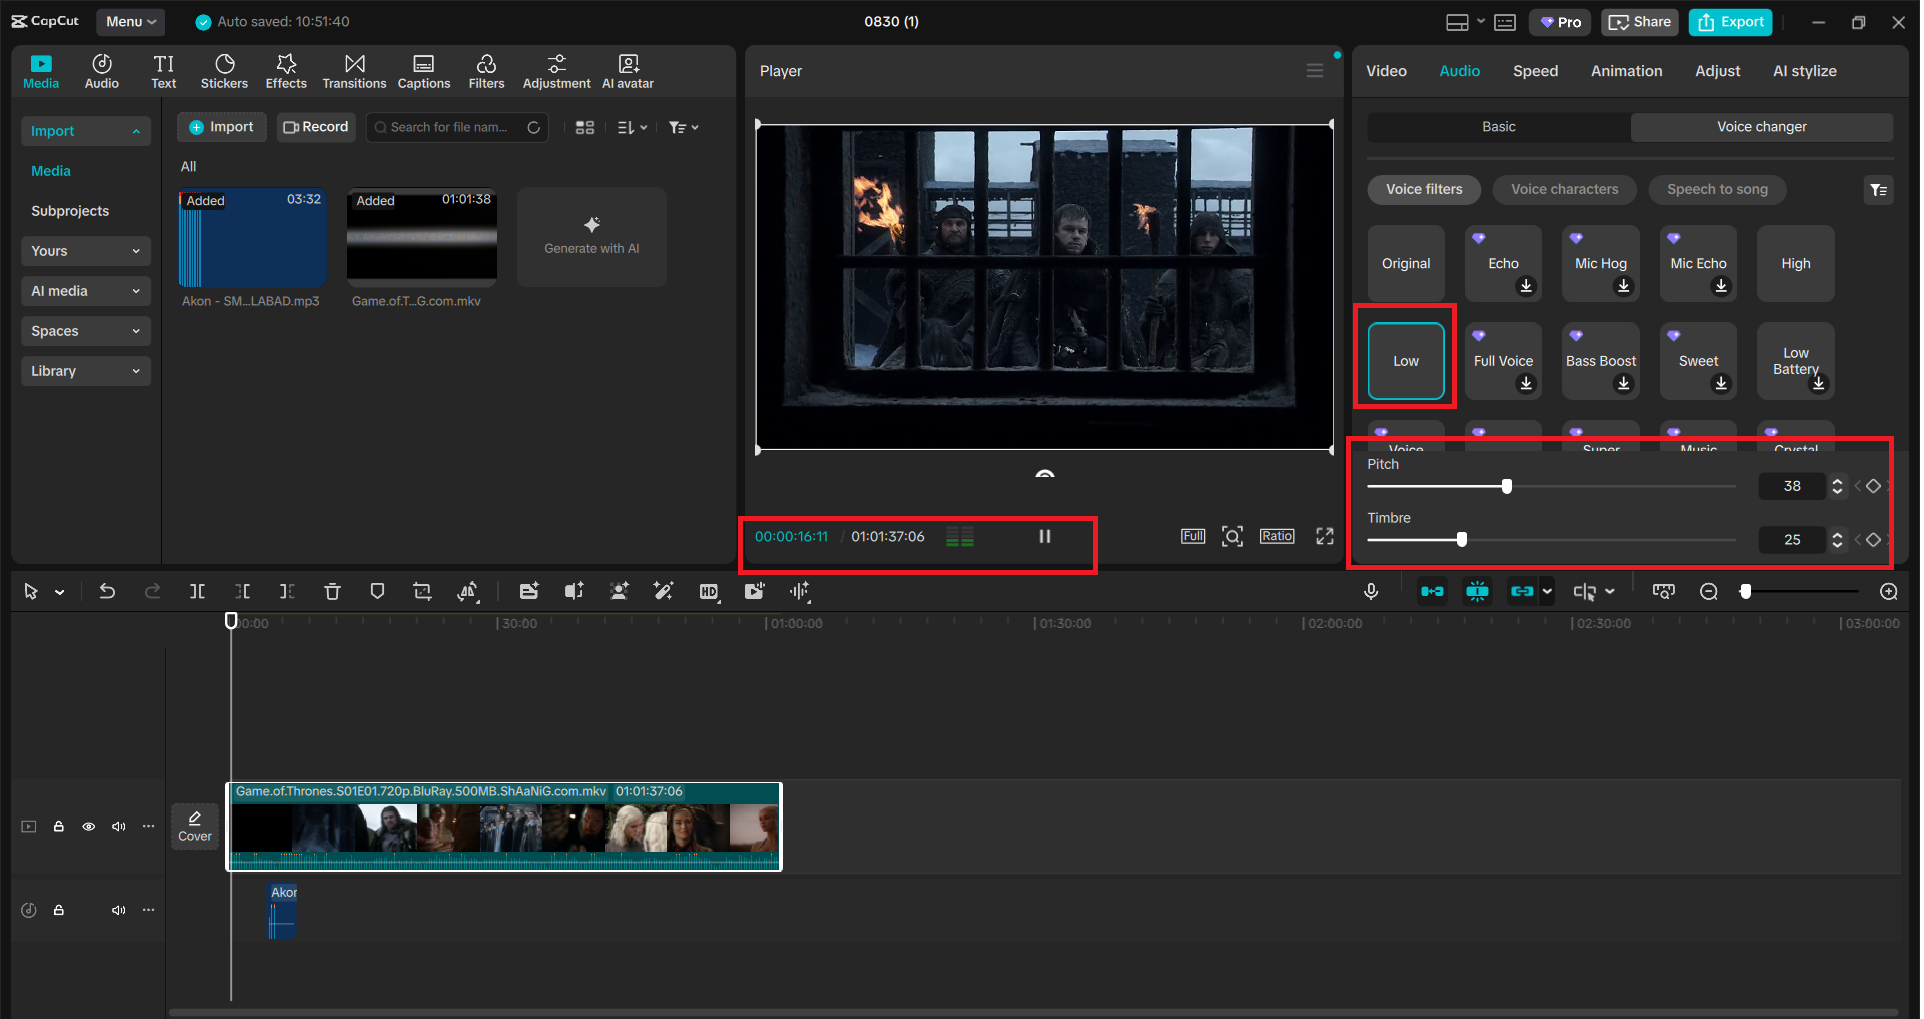
Step 3: Open the Voice Changer Menu
At the top of the screen, click “Audio.” On the right-hand panel, change to the voice changer tab. You’ll find features like Voice filters and Voice characters, and Speech to song. They have various effects, which are aimed at different moods and editing styles.
Step 4: Choose and Preview a Voice Effect
Browse through options like Tube TV, Drift, Ghost Story, Lost Soul, Telephone, or DJ Warp. All of them shift the pitch, tone, or sound of the voice differently. The telephone sound is retro and old school, and Ghost Story is all spooky and creepy. Click once to use an effect, then click play in the Player window to preview. When it does not fit, just grab another one until you get it.
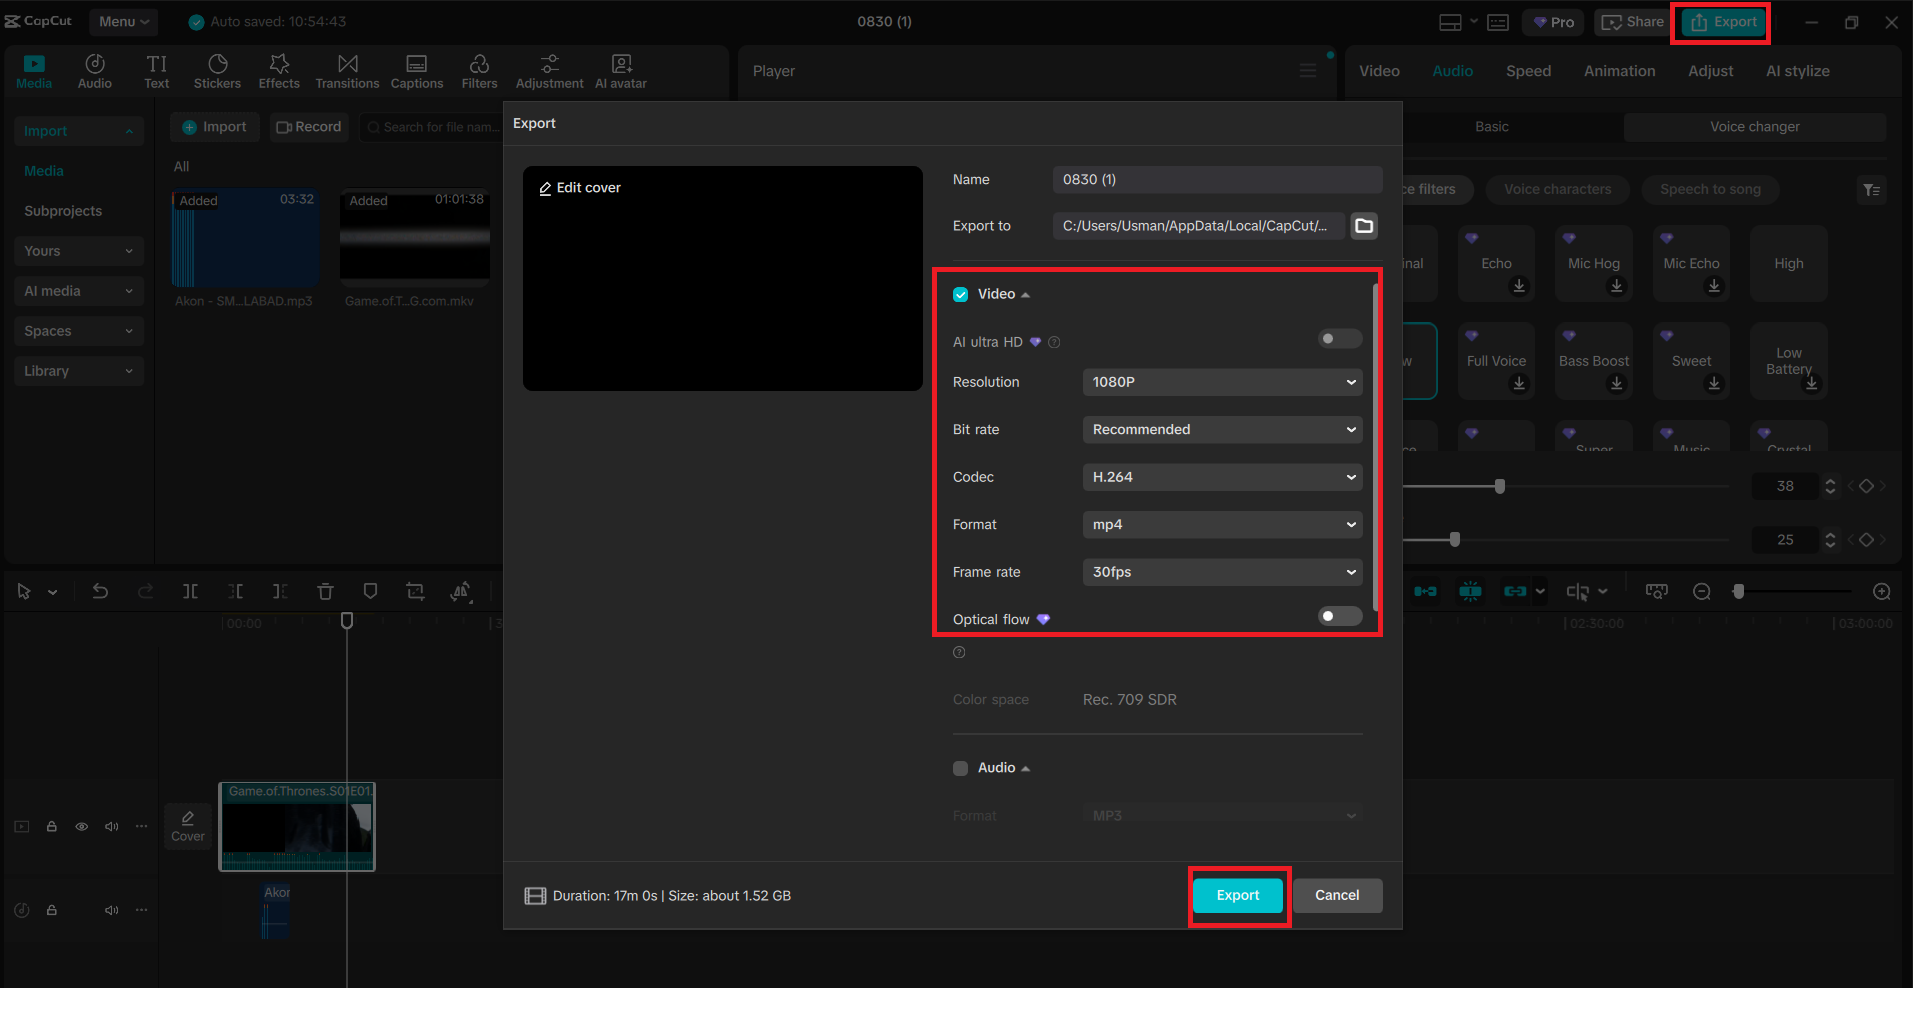
Step 5: Export Your Edited Video
When you are ready to create the video, you need to select the “Export button in the upper-right corner. It will open into a window where you can choose the settings, such as file name, the resolution, frame rate, and format. In the case of social media, 1080p is the best; however, 4K can be used with greater quality. After this, all ready, on a second time, you can click on the Export button to save your completed project with the new voice effect.
Use Cases for CapCut’s Voice Changer
Voice changer is not just a fun addition, but it can be practically applied in various content types. The following are just a few of the uses of it:
Gaming videos – Add dramatic or funny voices to Gaming commentaries.
TikTok memes and challenges – Use funny filters to suit the trending format.
Storytelling and narration – Vocalyze character voices of stories, skits, or animations.
Spooky or dramatic edits – Filters such as Ghost Story or Lost Soul, suit horror-themed videos best.
Professional presentations – Use voice to emphasise or make the audio sound more interesting.
You can discover the combination of filters that fits the mood of your project by trying different filters.
Why CapCut is More Than Just a Video Editor
CapCut not only deals with the trimming and filtering of clips. The fact that it is actually an all-in-one system allows creators to edit videos, improve sound, add captions, and use special effects without additional software. Besides, when you need to make some visuals to create your video projects, you may combine your video editing with an online photo editor and make thumbnails, banners, or cover photos. This also makes CapCut a video and a content creation hub.
One of the fastest methods to make your videos stand out in CapCut is to add a voice changer. All it takes is a few clicks- picking the track, adding an effect, and exporting it- you can totally change the way your video sounds.
The simplicity of CapCut, along with such higher features as the voice changer, helps creators to be sure that they can be as creative as they like without any technical challenges. You can give CapCut Desktop a spin in case you desire an all-in-one editing platform that is both fun and professional.